Tilt Shift Photography
By: Isabelle Langlois
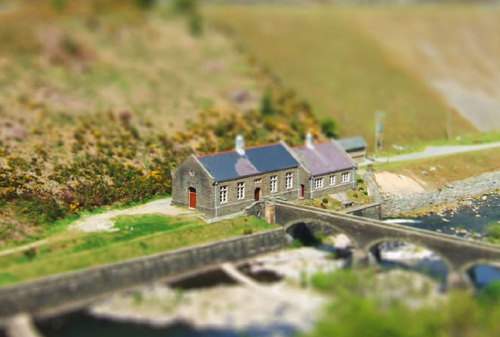
Tilt shift photography is the art of photographing real people, objects, or landscapes to give the illusion of them being miniature. This photographic genre has being gaining in popularity within the last few years.
Tilt shift effects can be done one of two ways; optically with a special lens purchased for your camera, or using Photoshop or any other photo editing program to add effects to a photo to make it look miniature.
The special lenses needed for the tilt shift photography effect are very expensive.
Using Photoshop to receive the tilt shift effect can be done many different ways, for the skilled Photoshop user it can probably be done in under a minute. There are also many free options such as tiltshiftmaker.com and several iPhone apps.
The first step to creating tilt shift photography is to choose your photo. You should choose your photo carefully as it determines how well your entire project will turn out. These are some things to look for when searching for a possible photo candidate:
Once you have selected your photo it’s time to add the tilt shift effect. First decide what you want the focal point of the photo to be. Then create a layer mask, select the focal point of your image with the gradient tool of the layer mask. Then apply the lens blur gradient. This will give the illusion of the object or scene being miniature. After you are happy with the blur gradient then you may add any other desired effects such as changing the saturation of the photo to the desired level. And those are the steps to editing a tilt shift photo.
Tilt shift photography has been around since the 1960’s, Nikon having tilt movements in their 35 mm cameras from 1962. Canon has provided lenses that have tilt and shift movement in 1973. Some photographers have used these lenses for use of selective focus in medium such as portrait photography. Selective focus is often very intriguing as the effect changes the depth and the plane of focus in ways we are not used to. This is one of the many reasons that tilt shift has become so popular.
Tilt shift effects can be done one of two ways; optically with a special lens purchased for your camera, or using Photoshop or any other photo editing program to add effects to a photo to make it look miniature.
The special lenses needed for the tilt shift photography effect are very expensive.
Using Photoshop to receive the tilt shift effect can be done many different ways, for the skilled Photoshop user it can probably be done in under a minute. There are also many free options such as tiltshiftmaker.com and several iPhone apps.
The first step to creating tilt shift photography is to choose your photo. You should choose your photo carefully as it determines how well your entire project will turn out. These are some things to look for when searching for a possible photo candidate:
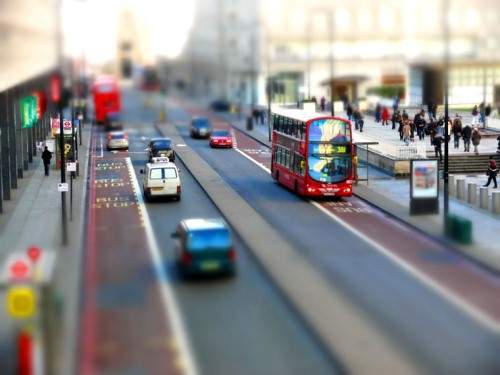
- The photo must be taken from above, but not directly overhead. This only reflects what someone taking a photo of a miniature scene would likely do; it’s unlikely they would (or even could) be level to the subject. If you have a direct over shot, you won’t be able to get a decent depth of field that is required.
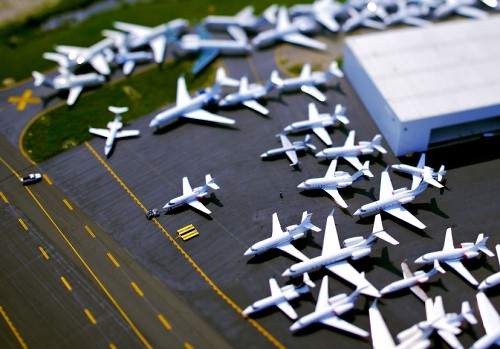
- A simple scene is usually better than a complicated one. This is because miniature scenes are usually very simple; you wouldn’t find a dense city block, for example, in a model railroad scene.
- Photo sharpness is a must, as well as good lighting. There will be enough blur in the photo as it is; your focal point must be sharp.
- If people are in the scene, they need to be fairly obscure and small. Again, reflecting what you’d see in a real miniature scene. People are very small, and not well detailed in miniature scenery.
- Generally, avoid wide shots, and make sure the scene is interesting – for instance, an aerial photo of a cathedral with spires and flying buttresses is interesting, while an aerial photo of a flat-topped shopping mall would not be.
Once you have selected your photo it’s time to add the tilt shift effect. First decide what you want the focal point of the photo to be. Then create a layer mask, select the focal point of your image with the gradient tool of the layer mask. Then apply the lens blur gradient. This will give the illusion of the object or scene being miniature. After you are happy with the blur gradient then you may add any other desired effects such as changing the saturation of the photo to the desired level. And those are the steps to editing a tilt shift photo.
Tilt shift photography has been around since the 1960’s, Nikon having tilt movements in their 35 mm cameras from 1962. Canon has provided lenses that have tilt and shift movement in 1973. Some photographers have used these lenses for use of selective focus in medium such as portrait photography. Selective focus is often very intriguing as the effect changes the depth and the plane of focus in ways we are not used to. This is one of the many reasons that tilt shift has become so popular.
|
|
|
